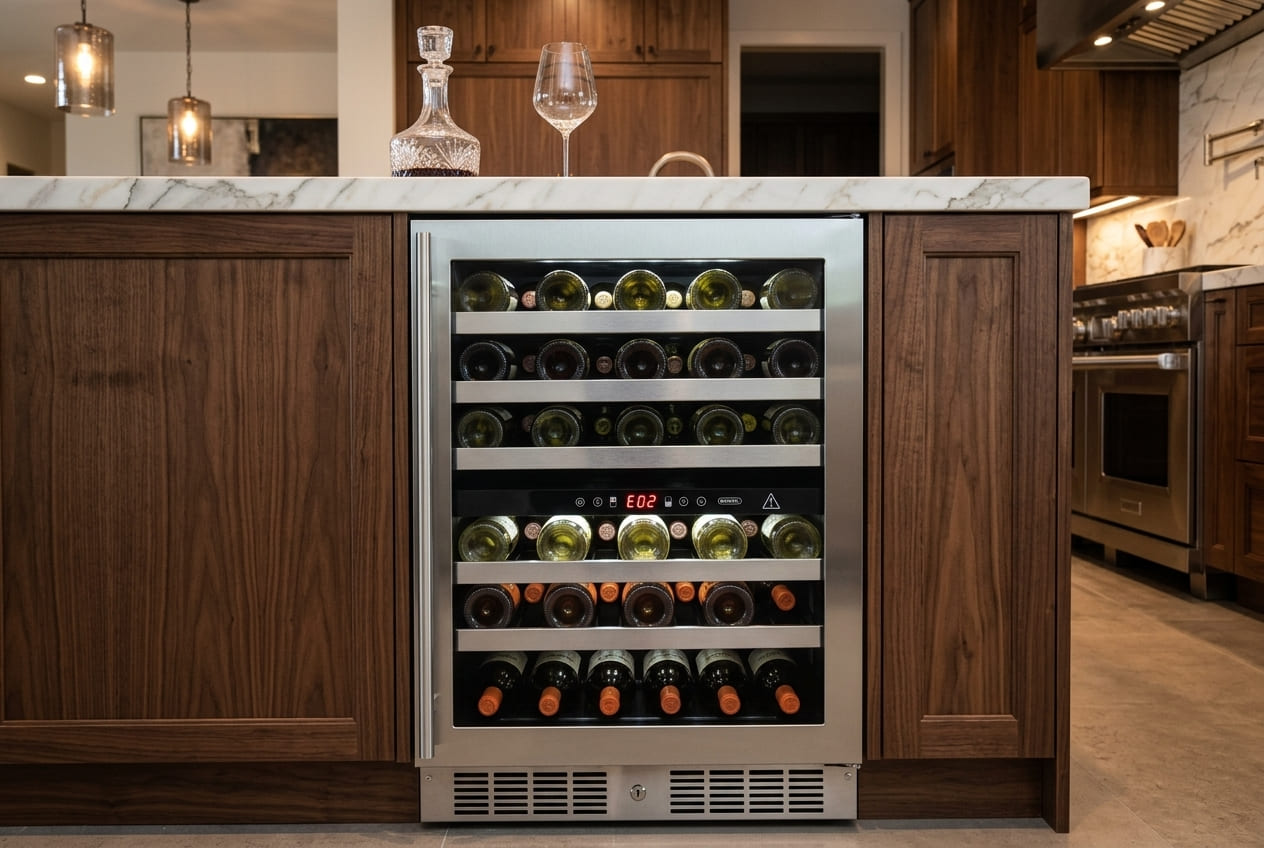
The moment E02 appears on the Intuit Controls display of your Marvel wine cooler, the unit is telling you something specific: the upper-compartment temperature sensor has reported an open-circuit condition. The control board expected a resistance reading from that sensor, received nothing it could interpret as valid, and flagged the fault.
If you’ve already read about the Marvel E01 error code, this will sound familiar — and it should, because the underlying fault type is the same family. But E01 and E02 are not interchangeable. E01 targets the lower-compartment sensor. E02 targets the upper-compartment sensor. In dual-zone models, that distinction matters enormously for diagnosis, because the two sensors are physically located in different parts of the unit and routed through separate wiring harnesses. Checking the wrong sensor wastes time and potentially leads to replacing the wrong component.
E02 Quick Reference | |
Code | E02 |
Meaning | Upper-compartment temperature sensor — open-circuit fault |
Zone Affected | Upper compartment (in dual-zone models); entire cabinet in single-zone units where applicable |
Likely Cause | Loose wiring harness connection, ice buildup around the sensor, or failed thermistor |
Urgency Level | Moderate — upper-zone cooling may be degraded or unregulated |
First Action | Check for visible ice accumulation around the upper sensor area before touching any wiring |
Contrast With | E01 (lower-zone sensor fault); E03 (short-circuit defrost sensor — significantly more urgent) |
There is one important diagnostic distinction that separates E02 from E01 in practice: ice buildup. In dual-zone Marvel coolers, the upper compartment sensor is positioned in an area that is more susceptible to frost accumulation under certain operating conditions — particularly when the door has been left open for extended periods or the door seal has been degrading gradually. Ice forming around the sensor body can physically break the circuit, generating an E02 fault without any component failure whatsoever. This makes the inspection sequence for E02 slightly different from E01: check for ice first, wiring second, sensor resistance third.
Open Circuit Faults: Wiring and Thermistor Basics
Before working through the physical diagnosis, it helps to understand what “open circuit” actually means in plain terms — because it shapes everything about how you approach the repair.
An electrical circuit works by providing a continuous path for current to travel. A thermistor sensor in a Marvel wine cooler sits in that path: current flows from the Intuit Controls board through the wiring harness, through the sensor, and back to the board. The board measures the resistance across that path — that resistance value is the temperature reading. A normal sensor creates a predictable, variable resistance. An open circuit means that continuous path has been broken somewhere. No current flows. The board measures infinite resistance or nothing at all, and registers the condition as a fault.
The break can occur in three places: at the connector on the board end of the harness, at the connector on the sensor end, or within the sensor component itself. A loose connector creates an intermittent open circuit — the reading drops out when the connection vibrates free and returns when it seats again, which is why E02 sometimes appears and disappears without apparent cause. A failed thermistor creates a permanent open circuit — the reading is gone entirely and won’t return no matter how many times you reseat the connector.
The thermistor potentiometer control box kit is the documented repair component for this type of sensor fault in Marvel wine coolers — a replacement assembly that includes the sensor and its associated wiring components. When a technician confirms that the thermistor is the root cause of E02, this is typically the replacement part ordered. Understanding what the kit contains helps set expectations for the repair scope: it’s not just swapping a single sensor element, but replacing the assembly as a unit.
Dual-Zone Models: Why the Upper Compartment Sensor Is Different
In a single-zone Marvel wine cooler, there is one temperature sensor managing one temperature environment. In a dual-zone model, there are two separate sensors, two separate temperature setpoints, and — critically — two separate fault codes. E01 belongs to the lower zone. E02 belongs to the upper zone. The control board handles them independently, which means a fault in the upper zone doesn’t necessarily affect the lower zone’s operation and vice versa.

The upper-compartment sensor on a dual-zone Marvel unit is typically positioned near the top of the upper cabinet section, mounted on or near the evaporator assembly for that zone. The wiring harness for the upper sensor runs a longer path than the lower sensor — from the sensor location, down through the cabinet interior, and back to the control board, which is typically located at the base of the unit. A longer harness run means more connection points, more opportunity for vibration to work a connector loose over time, and more surface area along which a pinched or damaged wire can create an intermittent open circuit.
Think of it this way: if the lower zone of your dual-zone cooler is holding its temperature correctly but the upper zone is drifting, and E02 is showing on the display, the diagnosis is contained. The problem is in the upper-zone sensor circuit. The lower zone is fine. A technician diagnosing your unit for an E02 fault will go directly to the upper sensor and its harness — they’re not investigating the entire refrigeration system.
For owners who haven’t confirmed whether their unit is single-zone or dual-zone: check the front panel. A dual-zone Marvel wine cooler will display two separate temperature setpoints on the Intuit Controls panel, one for each zone, with the ability to set them independently. A single-zone unit shows one temperature. If your unit is single-zone and showing E02, the code refers to the main (and only) temperature sensor for the upper portion of the cabinet — the diagnostic path is the same, but there is no independent lower zone to compare against.
Ice Buildup Around the Sensor: A Common E02 Trigger
This step comes before the multimeter test for one reason: it can resolve E02 entirely without any component replacement or electrical testing. Ice accumulation physically around the sensor body can break the circuit in the same way a failed sensor does — and a unit that was operating normally until recently, in a home where the door was opened frequently or the door seal has been gradually degrading, is a candidate for ice-induced E02 before it’s a candidate for sensor failure.
Work through this thaw-and-inspect procedure before doing anything else with the wiring:
- Unplug the unit completely. Don’t attempt to inspect the sensor area while the unit is running. Remove all wine bottles from the upper compartment and set them aside in a cool location — a refrigerator, a cooler with ice, or a temperature-stable room.
- Leave the upper compartment door open and allow the unit to thaw at room temperature. The thaw period depends on how much ice has accumulated. For light frost, 8–12 hours may be sufficient. For significant ice buildup around or behind the evaporator panel, allow a full 24–48 hours with the door open. Do not use a heat gun or hair dryer to accelerate the thaw — forced heat can damage sensor wiring, gaskets, and the evaporator itself.
- After thawing, dry the interior thoroughly. Use a clean, lint-free cloth to absorb standing water from the bottom of the compartment and from any surface where moisture has pooled. Pay particular attention to the area directly around the sensor — if the sensor body was encased in ice, confirm it is now fully dry before reconnecting power.
- Reconnect power and observe the display. If E02 clears on startup and the unit returns to a normal temperature reading, ice accumulation was the cause. Monitor the display and the upper zone temperature for the next 24 hours to confirm the code does not return.
This is a diagnostic test, not a guaranteed fix — it confirms or rules out ice as the cause. If E02 returns after a full thaw-and-dry cycle, the ice was not the root cause, or the conditions that caused the ice buildup (a failing door seal, a stuck-open door, high ambient humidity) are still present and will cause the same problem to recur. Addressing the underlying reason for ice accumulation — typically the door seal — is as important as clearing the code.
If the thaw procedure doesn’t clear E02, proceed to the multimeter test.
Multimeter Testing for an Open-Circuit Fault
If the thaw procedure didn’t resolve E02, and the wiring harness is fully seated at both ends (board side and sensor side), the thermistor itself needs to be resistance-tested. This is the same multimeter procedure described for E01, applied to the upper-compartment sensor.
Before starting: Unplug the unit. The thermistor must be disconnected from the harness before testing — testing resistance across a connected circuit while powered will give an invalid reading and may damage the meter.
- Access the upper-compartment sensor. In most dual-zone Marvel undercounter wine coolers, the upper-zone sensor is located on or near the evaporator assembly at the top of the upper compartment. Accessing it typically requires removing the upper compartment’s interior back or top panel — consult your model’s service documentation for the specific panel removal method.
- Disconnect the thermistor from the harness connector.
- Set the multimeter to resistance (Ω) mode. If your meter has a continuity test function, use that first as a quick check: no continuity (no beep, infinite resistance reading) confirms the thermistor is open.
- Place the meter probes on the two thermistor leads. Polarity is not relevant for this test.
- Record the reading and compare it using the table below.
Multimeter Reading | Interpretation | Recommended Action |
Resistance within manufacturer’s documented range for current ambient temperature | Thermistor is functioning correctly | Fault is in the harness wiring or the control board — professional diagnosis required |
Resistance significantly outside manufacturer’s documented range | Thermistor has drifted out of specification | Thermistor potentiometer kit replacement recommended |
Infinite resistance / no continuity (OL on display) | Thermistor is fully open — completely failed | Thermistor potentiometer kit replacement required |
Near-zero resistance | Thermistor is shorted — different fault type | Investigate for E03 conditions; professional diagnosis |
The same qualification that applies to E01 applies here: thermistor resistance is temperature-dependent. The “correct” resistance value at 55°F is different from the correct value at 70°F. Without the manufacturer’s resistance-vs-temperature specification table for your specific model, interpreting a raw ohm reading requires knowing what it should be at the temperature where you’re testing. If you have access to Marvel’s service documentation for your specific model, the resistance chart will be included there. If you don’t, a technician familiar with Marvel units will have it — and attempting to interpret the reading without a reference spec risks acting on incorrect conclusions.
An inconclusive result from the multimeter test — a reading that’s in the plausible range but doesn’t match the spec precisely — is the most common scenario where professional diagnosis saves money. A technician who can compare the live reading against the reference table gives a definitive answer. A DIYer making a judgment call on an ambiguous number may replace a functional sensor unnecessarily.
Repair or Replace? Weighing the Cost of E02
Once the diagnosis is clear — the sensor is genuinely failed, the harness connection is secure, and the thaw procedure has confirmed ice wasn’t the cause — the decision framework for E02 comes down to the age and overall condition of the unit relative to the cost of the repair.

E02 in a relatively young Marvel wine cooler (under seven years old, in otherwise good condition) is almost always worth repairing. The thermistor potentiometer control box kit is the documented repair component, and the labor to access and replace the upper-zone sensor is relatively straightforward for a technician familiar with the model. A well-executed sensor replacement restores full temperature regulation to the upper zone and leaves the unit with an expected remaining service life of many additional years.
E02 in an older unit with other developing issues — a door gasket that’s been replaced once already, a condenser fan motor that occasionally buzzes, visible wear on the door hinge mechanism — is worth discussing honestly with a technician before committing to the repair. The question isn’t “is the sensor worth replacing” in isolation; it’s “is this the last repair this unit will need for the next three years, or is this the first of several?” A technician who can examine the unit’s overall condition during the E02 service call can give you an informed answer to that question.
One scenario that warrants particular caution: if E02 is returning after a previous sensor replacement — confirmed replaced, not just reset — the fault has escalated to the control board. A control board replacement on a Marvel wine cooler is a more significant repair cost, and the repair-vs-replace math changes accordingly. This is not a common outcome, but it does occur, and a technician encountering recurring E02 post-sensor-replacement should check board voltage output at the sensor terminals before ordering a second thermistor kit.
Only a technician can confirm whether the board is the actual culprit — there is no reliable DIY test for this.
The core principle: a technician diagnosis is the only reliable way to confirm whether the sensor or the control board is at fault before spending money on parts. A diagnostic visit that costs the same as one sensor kit but rules out the board is money well spent.
Conclusion
Marvel error code E02 is an open-circuit fault in the upper-compartment temperature sensor — diagnosable, repairable, and in the majority of cases resolved without a control board replacement. The diagnostic sequence is straightforward: check for ice buildup first, inspect the harness connection second, test the thermistor resistance with a multimeter third, and reset the unit after addressing whatever the inspection found.
In dual-zone models, the zone separation between E01 and E02 is the detail that prevents a misdiagnosis. E01 is the lower zone. E02 is the upper zone. Checking the wrong sensor means replacing the wrong component, and in dual-zone modelsl, the sensor locations are distinct enough that a technician unfamiliar with Marvel’s architecture can go to the wrong place. If you’re not certain which sensor to access on your specific model, look it up in the owner’s manual or call a technician who knows the model before you start removing panels.
The stakes of leaving E02 unaddressed are the same as E01: temperature instability in the affected zone, which translates to wine stored at a temperature the cooler can’t accurately maintain. For a collection being actively aged, that’s a meaningful risk. For bottles being chilled for near-term drinking, the window of acceptable drift is somewhat wider — but it’s still a window that closes as the fault progresses.
For the full picture of how the Marvel E-code family relates to each other — including the significantly more urgent Marvel E03 error code — see our dedicated guides for each code. For Atlanta-area service on a confirmed E02 fault, Appliance Repair Master is the reliable next step.
FAQ
1. Can the Marvel E02 code appear without any visible ice in the cooler?
Yes — and this is more common than the reverse. Ice buildup is one cause of E02, not the only cause. A loose harness connector that has backed out of its socket through normal door vibration will generate E02 with no ice present at all. A thermistor that has drifted outside its resistance specification due to age or component wear also generates E02 without any frost. The thaw-and-inspect procedure is worth doing if there’s any possibility of ice — but a clean, frost-free upper compartment that still shows E02 points directly to the wiring harness or the sensor itself.
2. My Marvel wine cooler shows E02 only in the mornings — what would cause intermittent triggering?
Intermittent E02 — appearing at certain times and clearing on its own — is the signature pattern of an intermittent connection rather than a fully failed sensor. A thermistor that has failed completely generates a permanent E02 that doesn’t clear without intervention. A connector that is partially unseated but not fully open creates a circuit that may conduct adequately when the unit is at stable temperature but loses contact when components contract slightly in cooler conditions. Overnight, as the cabinet temperature drops and metal components contract marginally, a marginal connector may lose contact — generating E02 in the morning. As the ambient warms up slightly, contact restores and the code clears. The fix is to fully reseat the harness connector and confirm it’s locked in position. If the intermittent pattern continues after reseating, the connector or harness needs replacement.
3. Is E02 more likely to occur in dual-zone Marvel units than single-zone models?
In practice, yes — for structural reasons rather than quality reasons. Dual-zone models have two sensors instead of one, doubling the number of sensor-related points that can develop a fault. The upper-zone sensor’s wiring harness runs a longer path through the unit than it would in a single-zone model with a single centrally-positioned sensor, creating more opportunity for vibration-induced connector loosening along the route. This isn’t a design flaw — it’s a geometric reality of having two independent temperature zones in a compact undercounter footprint. It does mean that dual-zone Marvel owners should include a sensor harness check in their annual maintenance routine.
4. How do I safely thaw the sensor area on my Marvel wine cooler?
Unplug the unit completely, remove all wine from the upper compartment, open the door, and allow thawing at room temperature with no heat applied. The safe target is room temperature air moving naturally through the open door. The timeline is 8–12 hours for light frost, 24–48 hours for significant ice accumulation around the evaporator or sensor. After thawing, dry all visible moisture thoroughly — particularly around the sensor body and the harness connector — before reconnecting power. Do not use hair dryers, heat guns, or any directed heat source. The sensor wiring insulation, door gasket material, and evaporator components are all vulnerable to heat damage at temperatures well below what a heat gun produces.
5. Will replacing the thermistor potentiometer kit permanently fix the E02 fault?
In the majority of cases, yes — when the diagnosis has confirmed that the thermistor is the root cause (failed open circuit, out-of-spec resistance reading, or harness damage that requires sensor assembly replacement), replacing the thermistor potentiometer control box kit resolves E02 permanently. The exception is a scenario where the control board itself is generating a false E02 reading — in that case, replacing the sensor doesn’t fix the underlying board fault, and E02 returns after the replacement. This escalation is uncommon but documented, and it’s the reason a confirmed diagnosis before ordering parts matters. A sensor replacement that doesn’t resolve E02 doesn’t mean the repair failed — it means the diagnostic picture has updated and the next step is board-level testing.